
Surface Veil in Pultrusion: Where Profile Finish Comes From
A pultruded profile can be dimensionally perfect and structurally sound and still get rejected at inspection — because of how its surface looks. Whitening, visible fiber texture, orange-peel roughness, longitudinal cracks: these are the defects that trigger claims, and they are also the defects most often "solved" by reaching for the wrong fix. The most common wrong fix is assuming that adding a surface veil — or swapping the one already on the line — will cure whatever the surface is doing. Sometimes it will. Often it will not, because the finish of a pultruded profile is produced by four variables together: the surface veil, the structural reinforcement, the resin system, and the die temperature and pull speed that govern how all of them cure.
This article breaks those four variables apart, maps the common surface defects to the layer most likely causing them, and gives a troubleshooting order you can run on the line without stopping production for a day. The goal is attribution first, adjustment second.
But "the veil makes the finish" is only true while the other three variables cooperate. A veil cannot hide fibers if the resin starves it. It cannot deliver a smooth skin if the cure cracks it. And no veil survives a die wall that is scoring or worn. Every surface defect you will meet lives at the intersection of the four — which is why attribution, not addition, is the skill that matters.
What "Surface Finish" Is Actually Made Of
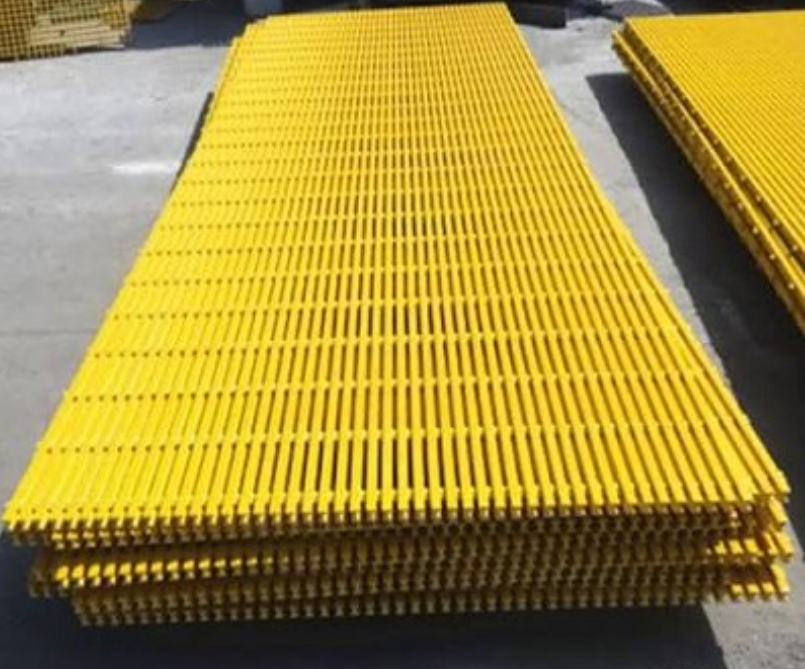
Start with what you are actually looking at when you inspect a profile face. A pultruded surface is three things stacked in one cured skin: a resin-rich outer layer, the quality of the cure behind it, and a faithful (or unfaithful) copy of the die wall it was pulled against. Pultrusion has no gel coat to lean on — unlike contact molding, where a gel coat carries most of the surface duty, a pultruded profile's finish is built entirely inside the die from whatever materials and parameters went in.
That is where the surface veil earns its place. Wrapped around the profile before the die and cured in position, a veil forms a smoother outer skin with fewer exposed structural fibers — the standard construction behind angles, channels, rods, and ladder components where the surface is part of the sell.
Where the Veil Sits in a Pultrusion Layup
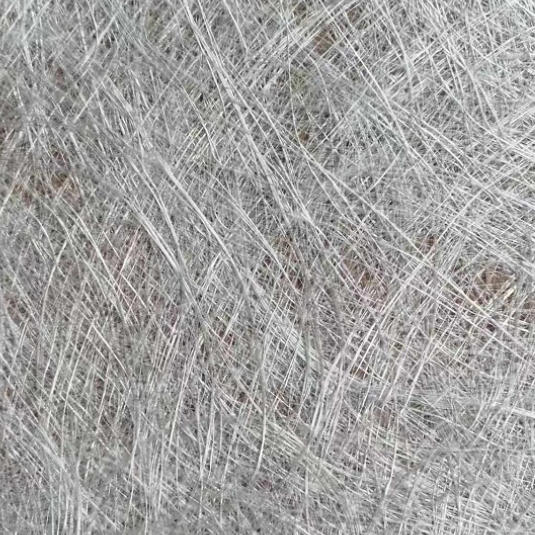
A surface veil is a non-woven sheet of ultra-fine glass fibers — typically 3.5 to 6 micrometers in diameter, far finer than chopped strand mat fibers — bonded with a resin-soluble binder. Ruifiber's range runs from 20 to 90 g/m², in series configured for hand lay-up, filament winding and pultrusion. The pultrusion series is the one this article is about: it wraps the profile continuously, enters the die with the structural package, and cures into the outermost skin.
One construction detail separates pultrusion veils from the hand lay-up grades you may know. On a contact mold, a veil works in gentle conditions — it is pressed into place by hand and stays put. On a pull line, the veil is under continuous machine tension for the whole run, so wet strength becomes a working requirement, not a nice-to-have. Veils engineered for pultrusion are specified with machine-direction wet tensile values — one supplier's 30 g/m² pultrusion tissue, for example, lists MD wet tensile of at least 35 N/50mm precisely so the web does not tear mid-run. If you have ever had a veil snap at the die entrance and spent an hour re-threading, you already know why that number exists.
How the veil gets its resin is also different. A documented pultrusion practice runs the veil rolls on racks at the die mouth, fed straight into the die without passing through the resin bath — the veil picks up resin from the excess present at the die entrance and carries a resin-rich surface into cure. Done right, the fine fibers end up suspended in the cured resin matrix, translucent in the finished skin.
That supply route explains most veil-side surface defects in one stroke: whatever interrupts even resin pickup at the die mouth — a dry edge, a misaligned web, an overlap in the wrong place — shows up as a surface feature a few meters later. (If you are new to veils generally — what they do in a laminate, how their three jobs differ from chopped strand mat's — that ground is covered in our surface veil guide; this article stays on the pultrusion line.)
There is a cosmetic corollary worth knowing before you specify. Because the fine fibers stay suspended in the cured resin rather than sitting as a distinct opaque layer, a well-made veil skin reads as translucent: the profile looks like solid, evenly colored resin rather than like glass. That is an asset on cosmetic faces, and it is also why the veil cannot be treated as paint — it modifies how resin sits at the surface, it does not cover it. Where an application needs the underlying structure to stay invisible, the veil's evenness does the optical work; where the structure is allowed to read through, a lighter veil or none at all can be the honest choice on faces nobody sees.
Defect to Cause to Action: The Attribution Table
Before touching anything, classify what you see. The table below maps the six surface defects that account for most pultrusion rejections to the layer most likely responsible, and the first adjustment worth trying. Direction of causation is cross-checked across industry troubleshooting sources; treat the "most likely" column as a starting hypothesis, not a verdict.
| Defect (what you see) | Most likely layer | Why it happens | First action |
|---|---|---|---|
| Whitening / white patches | Roving / impregnation | Yarn or mat not fully wetted; fiber content too high; impurities or air trapped between layers | Check bath level and impregnation before touching the veil |
| Fiber show / hairy texture | Resin package (veil + resin) | Resin-starved surface; pull speed too high for wet-out; no veil or too light a veil over coarse reinforcement | Confirm veil presence and continuity, then resin content |
| Orange peel / scaliness | Die (cure point) | Stress at the breakaway point too high; release happening ahead of full cure | Adjust die zone temperatures before changing materials |
| Longitudinal surface cracks | Die temperature / cure | Mid-die too hot or gradient too steep; pull speed too fast for even cure | Reduce zone-to-zone temperature step, then speed |
| Blisters / pockmarks | Resin / materials | Moisture in fibers, over-catalyzed resin trapping volatiles, low die-entry pressure | Check material storage and resin chemistry, not the veil |
| Dark groove marks running lengthwise | Veil layup | Surface felt folded or creased entering the die; local lap fault | Inspect veil feed path, tension and lap direction |
Two discriminators make this table work. First: local or uniform? A defect that repeats at one angular position or at regular intervals points at materials and feed — a veil lap, a specific package, a guide. A defect that is uniform around the circumference and responds to speed or temperature points at process parameters. Industry troubleshooting experience puts the large majority of surface defects on parameter mismatches rather than the machine itself — which is convenient, because parameters are the cheapest thing to change. Second: did it move when the line condition moved? A defect that follows a temperature change is thermal; one that persists across parameter changes is material.
The Veil Variable: Weight, Continuity, Wet-Out
When the attribution does land on the veil, three properties govern what it can do for the surface.
Weight. Heavier veil means a thicker resin-rich layer — more resin held at the face to bury the structural texture underneath. Lighter veil conforms and wets faster but masks less. The relationship is qualitative, not a formula: within the 20–90 g/m² commercial range, the roles roughly group as below.
| Veil weight band (g/m²) | What it tends to do on a profile | Watch out for |
|---|---|---|
| 20–30 | Thin, fast-wetting skin; masks fine textures | Coarse roving print-through if structure is heavy |
| 30–50 | General-purpose profile skin; the common middle | Balance between conformability and masking |
| 50–90 | Thicker resin-rich layer for harsher service faces | Slower wet-out; needs resin supply to match |
The uniformity of the veil matters as much as its weight. Because a veil's fine fibers are evenly distributed, resin uptake is even across the face — that evenness is what suppresses print-through of the reinforcement texture and reduces micro-defects in the cured skin. A veil with a weight fault, a folded zone or a damaged edge gives up that evenness exactly where the fault is.
Continuity. On a pultrusion line the veil is a web, and web faults are surface faults. Run this three-point check before blaming the veil grade itself: lap direction and width at the splice (a butt joint prints as a dark line; an excessive lap prints as a double-thickness band), web tension (too loose creases, too tight stretches and thins), and edge alignment (a wandering web lets one face run veil-rich while the other runs thin).
Wet-out. A pultrusion veil must accept resin fast at the die mouth, since in the common feed arrangement it wets from the entrance excess rather than a bath. Pultrusion-grade tissues are formulated accordingly — the same single-supplier example lists resin penetration under ten seconds and binder and moisture kept low for exactly this reason. If whitening appears on a veil-covered face and the bath checks out, the question becomes whether the veil grade's wet-out matches your resin chemistry and line speed — which is a supplier conversation, backed by a trial roll, not a guess.
The Other Three Variables, In Brief
Roving. Whitening and fiber fuzz have roving-side causes as often as veil-side ones: incomplete impregnation of the yarn bundles, fiber content pushed too high for the resin to carry, or a resin–fiber sizing mismatch that leaves poor wet-out no matter what the bath does. The same logic applies to mats in the package. (Which roving construction to run — direct or assembled — is a layup design question with its own logic, covered in a separate article.)
Resin. The resin system decides how the surface cures and shrinks. Formulations with the wrong filler loading or a weak internal release show up as die sticking and surface peeling; excess shrinkage pushes uncured resin out at the face as sticky weeps with surface cracking behind it; viscosity that runs too low drains away from the surface before gelation and leaves it resin-starved. These are formulation conversations, and they respond to chemistry changes, not veil swaps.
Die temperature and pull speed. The thermal profile writes itself into the skin. A mid-die zone running hot, or a steep step between zones, drives uneven cure and longitudinal surface cracking; running the line faster than the resin's cure kinetics support leaves a tacky, under-cured skin. Typical polyester die-zone temperatures and line speeds you will find in supplier guides are examples, not setpoints — the right numbers come from your resin supplier's data and your own trial record. On the mechanical side of the die, a scored or worn bore leaves powder and scratches on the surface and raises pull force; that is die maintenance territory, not material territory.
One caution belongs here rather than in any single variable section: the four variables interact, and the interactions are where good intentions go wrong. Raising line speed increases the demand on wet-out, so a resin–veil pair that looked fine at slow speed can whiten at fast speed — the defect appears at the speed change, but the cause is the pair's wet-out margin. Lowering a die zone changes where the cure point lands, which moves the breakaway stress and can turn a cracking problem into a scaliness one. This is the practical reason behind the one-variable rule below: not dogma, but the plain fact that with interacting variables, two simultaneous changes tell you nothing about which one mattered — and can cancel each other while the surface stays ugly.
A Troubleshooting Order That Works on the Line
Attribution only helps if it is organized. The sequence below resolves most surface complaints in one or two shifts without thrashing the line:
1.Photograph and locate. Shoot the defect, note its angular position and interval along the length. Periodic = material or feed; uniform = parameter.
2.Classify against the table. Name the defect (whitening, fiber show, scaliness, cracking, blisters, grooves) and read off the most likely layer.
3.Check the cheap, reversible things first. Bath level, veil web path and tension, lap quality, guide alignment — all inspectable without stopping the die.
4.Change one variable at a time, and give the change enough running length to judge before the next. Two simultaneous changes are how a fixable defect becomes a mystery.
5.Record everything, including the runs that did not work. The record is the product: next time the same signature appears, the answer is already on file.
The record itself needs structure, or step 5 is theater. A practical trial log fits on one page:
| Field | What to write |
|---|---|
| Date / shift / operator | Who ran it and when |
| Defect description + photo ref | What the surface shows, where (angular position, interval) |
| Veil | Grade, weight, batch, lap type observed |
| Reinforcement | Roving tex and batch, mat weights, layup order |
| Resin | System, filler, catalyst level, batch |
| Die zones | Setpoint per zone, actuals if instrumented |
| Line speed | Setpoint and stable value |
| Change made | One variable, one value, one direction |
| Result | Better / same / worse, with photo ref |
| Keep sample? | Where the kept length is stored |
Ten minutes of logging per trial buys a defect database that compounds in value for as long as the line runs.
The log also changes the quality of your supplier conversations. "The surface is white, sometimes" gives a veil or resin supplier nothing to work with; "whitening, uniform around the circumference, appeared after we raised speed from A to B, persists after a bath top-up, photo and log attached" lets their technical staff point at a likely cause in one reply. Suppliers respond differently to buyers who arrive with signatures — the answers get more specific, the trial materials get more relevant, and the second round of back-and-forth simply disappears. In surface troubleshooting, the vocabulary of description is itself a procurement asset.
When the Veil Is Not the Problem
The reverse discipline matters as much as the fix. Two signatures tell you to look away from the veil: the defect is uniform around the profile and it tracks parameter changes (thermal or resin-side cause), or it sits at one axial position on every length (die wall damage — check the bore, not the materials). Swapping veil grades against either signature burns a shift and muddies the record.
One more honesty note: veil suppliers — including us — often list reduced die wear among a surface veil's benefits, on the grounds that fine fibers at the face are gentler on the bore than coarse reinforcement. Treat that as a supplier-level claim. It is plausible and widely repeated, but the die's service life is governed by many factors, and a veil is not a maintenance plan.
Key Takeaways
1.A pultruded profile's finish is made by four variables — veil, reinforcement, resin, and die temperature/speed — and no single one of them owns the surface.
2.Attribute before adjusting: local defects point at materials and feed; uniform ones point at parameters.
3.Veil-side surface quality reduces to weight, continuity and wet-out; weight bands are qualitative, and continuity faults print directly onto the skin.
4.The common die-mouth veil feed makes resin pickup at the entrance the moment of truth for a resin-rich surface.
5.Keep a one-page trial log. The record, not the memory, is what makes the next defect fast to fix.
Surface veil is one input you control completely — grade, weight and continuity are specified at order time. Browse Ruifiber's fiberglass surface veil for the pultrusion series and weight range, or see the full product line to match veil, roving and mat in one RFQ.

Address
BLDG#26,MAX Technology Park Phase II,Baoshan District,Shanghai China
Phone
0086-21-56976143
0086-18621915640
021-56655615(Domestic)
13061721501
Hours
24-hour service
Shanghai Ruifiber Industry Co., Ltd.
Sales Office Address
Shanghai Ruifiber (Fengxian) Industry Park, Fengxian, Xuzhou, China
Tel:+86-21-56976143 021-56655615(Domestic) +86-18621915640 13061721501
Fax: +86-21-5697 5453
Web site: www.rfiber-laidscrim.com
Online Shops: https://ruifiber.en.alibaba.com (International) https://ruifiber.1688.com(China)
Shanghai Ruifiber (Fengxian) Industry Park

Shanghai Ruifiber (Fengxian) Industry Park
Address: Fengxian Electric vehicle Industrial Park accessories Park, Xuzhou, Jiangsu, China
Want to work with us?
Post time: Nov-13-2026