
How Many Layers of Chopped Strand Mat? Weight-to-Thickness, With Real Numbers
Ask five suppliers how many layers of chopped strand mat you need for a 3 mm laminate and you may get five different answers. That is not because anyone is wrong — it is because the question hides a second question: how thick is one layer? And the thickness of a single cured ply of CSM is not a fixed property of the mat. It depends on how much resin you pull through it and how hard you roll it. Published figures for the same 450 g/m² grade, for example, range from roughly 0.9 mm to about 1.15 mm per layer — a spread of nearly 30% — simply because different sources assume different resin-to-glass ratios.
This article gives you the full picture: what actually controls single-ply thickness, an estimate table for all nine common weight grades, worked examples that convert a target thickness into a layer count, and a three-step method to calibrate the numbers in your own workshop so you stop borrowing other people's assumptions.
Why "How Many Layers" Has No Single Answer
A thickness chart feels authoritative because it prints exact numbers. But every published per-ply thickness is an estimate built on two assumptions: the fibre volume fraction the author expects from the process, and the compaction the author expects from the laminator. Change either assumption and the same mat produces a different cured thickness.
Suppliers who publish calculated values usually state this openly. One European supplier, for instance, lists its per-layer thickness figures as "calculated values at 15 vol.% fibre content" and immediately notes that actual thickness varies with resin quantity, processing and compaction. Workshop-oriented sources quote slightly lower numbers for the same grades because they reflect typical hand lay-up practice, where rolling squeezes out excess resin and the fibre content ends up higher. Neither number is wrong; they answer different questions.
So the useful form of the question is not "how many layers for X mm?" but "how many layers under my resin ratio and my rolling?" — which is why this article ends with a calibration method rather than a definitive chart.
The gap between assumptions has commercial consequences, not just technical ones. If a quotation is built on a 0.9 mm ply assumption and the floor actually achieves 1.15 mm with its resin habits, the laminate comes out 0.75 mm oversize on a six-ply build — extra glass bought, extra resin mixed, extra weight shipped. The reverse error is worse: a quote assuming the thicker ply under-builds the part, and the shortfall only shows up at final inspection, when the cheapest fix is a full extra ply over the whole surface. Writing the assumed ply thickness into the quotation, next to the target, is the cheapest contract clause a fabricator can add.
What Determines the Thickness of One Layer
After cure, the thickness of one CSM ply comes from the volume of everything you laid down: glass plus resin, with air rolled out. Glass fibres have a density of about 2.55 g/cm³; cured polyester resin sits near 1.2 g/cm³. Chopped strand mat is a naturally resin-rich reinforcement — hand lay-up laminates typically end up around 25–35% glass by weight, far below what woven fabrics achieve — because the random, bulky fibre architecture traps a lot of resin between the strands.
That resin share is the swing factor. Weight percentages and volume percentages also tell different stories: because glass is roughly twice as dense as resin, a laminate that is 28% glass by weight is only about 15% glass by volume. Two sources quoting "15 vol%" and "30 wt%" for the same grade are therefore describing nearly the same laminate, not contradicting each other.
From these densities you can compute an estimate yourself. With W the mat weight in g/m² and r the resin-to-glass weight ratio (around 2.0–2.5 for hand lay-up on mat), the cured ply thickness in millimetres is approximately:
t ≈ W × (0.39 + 0.83 × r) / 1000
Two sanity checks against published figures: at r = 2.5, 300 g/m² works out to about 0.74 mm — consistent with the 0.7–0.77 mm quoted by suppliers for that grade. At r = 2.0, 450 g/m² gives about 0.93 mm — right inside the 0.9–1.1 mm range commonly cited for hand lay-up. The formula is not a new standard; it is a transparent way to see which assumption produces which number.
Three practical levers move you along that range:
- 1.Resin ratio. Hungrier mixing and sloppier wet-out push r toward 2.5 and add thickness that is pure resin.
- 2.Rolling pressure. A well-worked paddle roller consolidates the ply, squeezes out voids and excess resin, and lands you near the thin end of the range.
- 3.Process. Vacuum-bagging and infusion compress the stack further — commonly cited figures are roughly 12% thinner than hand lay-up under vacuum and about 20% under infusion. Treat those percentages as supplier-level guidance, not laws of physics.
The same arithmetic runs backwards into material ordering, which is where layer counting actually saves or costs money. Once the lay-up is set — say three plies of 450 g/m² over a 40 m² mould — the mat to order is simply area × plies, plus a cutting allowance for the mould's shape. Complex curved tooling can easily consume 15–20% more mat than the net surface area, because offcuts around deep draws cannot be reused; large flat panels waste far less. Ordering by roll length against that number, rather than by rough estimate, is what keeps a fabrication shop from ending a job with a part-finished laminate and no matching roll on the shelf.
Estimated Ply Thickness by Weight Grade
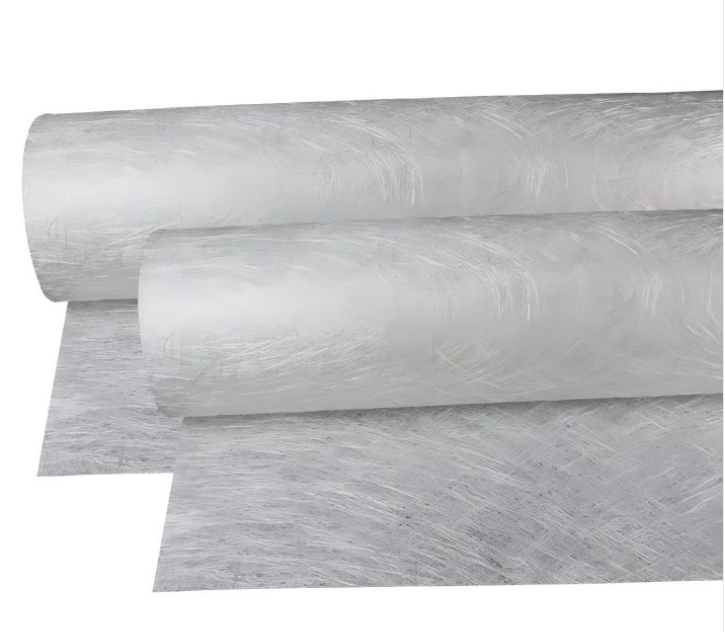
Chopped strand mat rolls - the areal weight grade, not a fixed chart, decides how much thickness each layer adds
Ruifiber's chopped strand mat runs in nine grades from 100 to 900 g/m², in widths from 100 to 3300 mm. The table below estimates cured single-ply thickness for each grade under typical hand lay-up conditions (resin ratio 2.0–2.5:1 by weight). These are estimates, not datasheet values — the same caveats as every chart above apply.
Ruifiber's chopped strand mat runs in nine grades from 100 to 900 g/m², in widths from 100 to 3300 mm. The table below estimates cured single-ply thickness for each grade under typical hand lay-up conditions (resin ratio 2.0–2.5:1 by weight). These are estimates, not datasheet values — the same caveats as every chart above apply.
| Grade (g/m²) | Est. cured ply thickness (mm)* | Resin use per layer (kg/m²)* | Typical role |
|---|---|---|---|
| 100 | 0.20–0.25 | 0.20–0.25 | Gel-coat backing, print-through barrier |
| 150 | 0.30–0.37 | 0.30–0.38 | Fine build-up on curved or small parts |
| 200 | 0.40–0.50 | 0.40–0.50 | Light laminates, repairs |
| 225 | 0.45–0.56 | 0.45–0.56 | Controlled layering, fine tolerance work |
| 300 | 0.60–0.75 | 0.60–0.75 | Universal grade; complex moulds |
| 375 | 0.75–0.93 | 0.75–0.94 | Mid-grade general laminating |
| 450 | 0.90–1.10 | 0.90–1.13 | Industry standard; predictable build-up |
| 600 | 1.20–1.50 | 1.20–1.50 | Faster build on large flat areas |
| 900 | 1.85–2.25 | 1.80–2.25 | Rapid thickness build, tanks and hulls |
*Estimated at 15–18 vol% fibre content (resin:glass 2.0–2.5:1 by weight), hand lay-up. Actual values vary with resin quantity, rolling and compaction — verify on your own tooling.
Two things worth noticing in the table. First, the resin column is not a footnote — for mat, the resin you need per square metre is roughly 2–2.5 times the glass weight, which is why experienced fabricators mix resin in several smaller batches rather than one large one. Second, the "typical role" column reflects why suppliers keep all nine grades alive: a 100 g/m² skin layer behind a gel coat and a 900 g/m² hull build-up are solving completely different problems, and neither can do the other's job economically.
Worked Examples: From Target Thickness to Layer Count
The fastest way to use the table is backwards: start from the thickness your drawing or customer calls out, pick grades, divide, then round up to whole layers — you cannot lay half a mat.
| Target | One reasonable lay-up | Estimated cured thickness* | Resin use* | Notes |
|---|---|---|---|---|
| 3 mm flat panel | 3 × 450 g/m² | 2.8–3.3 mm | 2.7–3.4 kg/m² | The most predictable route; each ply near 1 mm |
| 6 mm hull section | 3 × 900 g/m² (or 6 × 450) | 5.6–6.7 mm | 5.4–6.8 kg/m² | 3 heavy plies save labour; 6 × 450 consolidates better |
| 1.5 mm repair patch | 450 + 225 g/m² | 1.4–1.7 mm | 1.4–1.7 kg/m² | Mixed grades let you fine-tune without overshooting |
*Same estimate assumptions as Table 1; verify against your own cured coupons.
Read the 6 mm row carefully, because it contains the central trade-off of the whole topic. Three layers of 900 g/m² and six layers of 450 g/m² deliver almost identical thickness — and almost identical glass weight. What differs is labour (half the lay-up cycles with the heavy grade) against consolidation (each thinner ply rolls out more thoroughly, trapping fewer voids). On a large, flat hull section where labour hours matter, the heavy grade usually wins. On a complex mould where every ply must drape and consolidate, the lighter grades win. That choice — not the arithmetic — is where the real engineering judgement lives.
The fastest way to use the table is backwards: start from the thickness your drawing or customer calls out, pick grades, divide, then round up to whole layers — you cannot lay half a mat.
| Target | One reasonable lay-up | Estimated cured thickness* | Resin use* | Notes |
|---|---|---|---|---|
| 3 mm flat panel | 3 × 450 g/m² | 2.8–3.3 mm | 2.7–3.4 kg/m² | The most predictable route; each ply near 1 mm |
| 6 mm hull section | 3 × 900 g/m² (or 6 × 450) | 5.6–6.7 mm | 5.4–6.8 kg/m² | 3 heavy plies save labour; 6 × 450 consolidates better |
| 1.5 mm repair patch | 450 + 225 g/m² | 1.4–1.7 mm | 1.4–1.7 kg/m² | Mixed grades let you fine-tune without overshooting |
*Same estimate assumptions as Table 1; verify against your own cured coupons.
Read the 6 mm row carefully, because it contains the central trade-off of the whole topic. Three layers of 900 g/m² and six layers of 450 g/m² deliver almost identical thickness — and almost identical glass weight. What differs is labour (half the lay-up cycles with the heavy grade) against consolidation (each thinner ply rolls out more thoroughly, trapping fewer voids). On a large, flat hull section where labour hours matter, the heavy grade usually wins. On a complex mould where every ply must drape and consolidate, the lighter grades win. That choice — not the arithmetic — is where the real engineering judgement lives.
Fewer Heavy Layers or More Light Layers?

The trade-off deserves its own section, because it interacts with a defect that inflates thickness measurements: trapped air.
"False thickness" is a real failure mode. Voids — tiny air pockets left between fibres where wet-out or rolling was incomplete — add measurable thickness but no structural value. A part can come off the mould at spec thickness and still underperform, because on paper the fibres are not doing the work the thickness suggests. The visual test is simple and worth training every laminator on: properly wet-out CSM turns translucent; any white patch is either dry glass or trapped air that needs rolling out before the next layer goes down.
Thin layers consolidate better. Each 300 g/m² ply presents less fibre volume for the roller to work through, so a disciplined multi-ply build tends toward the low end of the thickness range with fewer voids. Heavy grades concentrate the risk: less rolling per unit of glass, and a wetter, thicker ply that is easier to starve at the interface.
But thickness drives stiffness cubed. In a simplified bending-stiffness model, stiffness scales with the cube of laminate thickness — a part 10% thinner than planned gives up roughly 27% of its bending stiffness on that model. This is why chasing a thickness target with "more resin" is a trap: extra resin does add physical thickness, but resin is far more flexible than glass, so the stiffness gain is marginal and the weight penalty is real. Thickness should come from fibre, not from a resin pool.
And a mat-only laminate has limits. Chopped strand mat is quasi-isotropic and resin-rich by design — only a fraction of its fibre works in any single direction, so at equal weight it cannot match woven roving for directional strength. Mat is the right tool for conformability, isotropic behaviour and sealed, crack-resistant skins; when a design calls for directional strength at minimum weight, mat layers are usually interleaved with woven roving rather than stacked alone.
Calibrate in Three Steps
All of the above becomes genuinely useful once you replace the generic assumptions with your own measured factor. It takes one afternoon:
| Step | What to do | What to record |
|---|---|---|
| 1 | Laminate a small 2-ply coupon of a known grade (450 g/m² is convenient) with your production resin, your usual rolling, at your shop temperature | Grade, resin system and mix ratio, shop temperature |
| 2 | After full cure, measure thickness at 5+ points with a caliper or micrometer; average them | Average ply thickness, thickness of one cured ply = (total − peel-ply/surface extras) ÷ 2 |
| 3 | Divide the mat weight by your measured ply thickness to get your own conversion factor; recompute the tables above with it | Your factor in g/m² per mm, and your effective resin ratio |
From then on, layer counts for new thickness targets use your factor, not a supplier's. If you later move to vacuum bagging or infusion, run the coupon again — the compression that those processes apply means hand lay-up factors over-predict thickness.
The coupon from step 1 has a second life, too: hold the cured sample against the light. A uniformly translucent coupon confirms your wet-out technique; cloudy or milky zones flag where rolling needs work — the same inspection logic you will use on production parts.
Calibration is not a one-time event. Resin batches, shop temperature across seasons, and even roller wear all nudge the effective resin ratio, so re-running the coupon whenever a variable changes — a new resin supplier, a move from summer to winter lay-up, a new crew on the rollers — keeps the factor honest. Shops that log each coupon's factor alongside the date and resin batch build up a small dataset that turns thickness disputes with customers into a five-minute lookup instead of an argument. The habit costs one afternoon a season and quietly underwrites every thickness promise on the order book.
FAQ
How thick is one layer of 450 gsm chopped strand mat?
Around 0.9–1.1 mm in hand lay-up, with resin:glass between 2:1 and 2.5:1. Calculated values published at lower fibre volume fractions run slightly higher, near 1.15 mm. The honest answer is a range, not a point: measure one cured coupon on your own line and you will have a better number than any chart.
Can I build all my thickness with mat alone?
You can, and for isotropic, curved or skin-critical parts you often should. The cost is weight: mat laminates carry two to two-and-a-half times their glass weight in resin, so a mat-only section is heavier and less stiff than a woven-dominated laminate of the same thickness. For structural sections where stiffness per kilo matters, interleave mat with woven roving instead of stacking mat alone.
Does a resin-rich laminate mean a weak laminate?
Not automatically — it means a different balance. Glass provides the strength; resin fills, seals and bonds the layers. Mat laminates are resin-rich because their random, bulky structure needs resin to encapsulate every strand, and in exchange they conform to complex moulds, resist print-through and make forgiving repairs. The failure mode to avoid is not "rich" but "voided": air pockets are what actually weaken a laminate, which is why rolling discipline matters more than the resin ratio itself.
Choose the Grades, Then Prove It on Your Mould
One last habit worth keeping: whenever a drawing changes — a thickness callout revised, a laminate switched to a different resin — rerun the estimate before the material order, not after. Layer counts are cheap to recompute and expensive to discover wrong mid-lay-up.
Layer counting is arithmetic once the assumptions are yours: estimate with the formula or the table, round up to whole layers, then calibrate one coupon and never guess again. Keep the thin grades for skins and fine build-up, the heavy grades for fast section build on open moulds, and let the worked examples above be your starting templates.
Ready to pick grades? Browse Ruifiber's chopped strand mat range — 100–900 g/m² in nine grades, widths to 3300 mm — and order sample sections of the two or three grades your lay-up calls for: Fiberglass Chopped Strand Mat (CSM). For the full catalog, see Ruifiber products. If you are still deciding how mat should combine with woven roving in your laminate schedule, start with the material comparison first — the layer arithmetic only optimizes a combination you have already chosen.

Address
BLDG#26,MAX Technology Park Phase II,Baoshan District,Shanghai China
Phone
0086-21-56976143
0086-18621915640
021-56655615(Domestic)
13061721501
Hours
24-hour service
Shanghai Ruifiber Industry Co., Ltd.
Sales Office Address
Shanghai Ruifiber (Fengxian) Industry Park, Fengxian, Xuzhou, China
Tel:+86-21-56976143 021-56655615(Domestic) +86-18621915640 13061721501
Fax: +86-21-5697 5453
Web site: www.rfiber-laidscrim.com
Online Shops: https://ruifiber.en.alibaba.com (International) https://ruifiber.1688.com(China)
Shanghai Ruifiber (Fengxian) Industry Park

Shanghai Ruifiber (Fengxian) Industry Park
Address: Fengxian Electric vehicle Industrial Park accessories Park, Xuzhou, Jiangsu, China
Want to work with us?
Post time: Nov-10-2026